
Menu
Assign a 'primary' menu
Julian,
The frequency with which the container is refilled depends on variables including volume of air to be humidified (the size of the fruiting chamber), the external temperature, the windspeed or air currents (affected by the air exchange rate), and the number of foggers or misters used in each chamber.
The important thing is to keep the humidity in the 95-100% range and at the same time to circulate (exchange) the air in the fruiting chamber to remove carbon dioxide, introduce oxygen and filter out spores in the air (you’ll need a filter system for the air being take out of the chamber).
I would advise using a hygrometer and thermometer (can be found in one device), and start keeping a log to understand what humidity levels you get when the fogger’s on for 5 hours and off for 1 hour, on for 4 hours and off for 1 hour, etc. With the fruiting chamber I’ve been using the ratio has been 6. hrs on and 1 hour off. But the ratio that’s right for you will be dependent on the factors that I’ve mentioned above. In higher temperatures (approximately 24-26 C) we would go through 2-3 containers of water a day.
Hi Julian,
Yes, is the short answer to your question: in my farm the fogger is placed in a 50 litre container that is 3/4 filled with water, and a 4″ fan is attached to the container to push the air out of the container and into the fruiting chamber. The fan is in-line, that is it’s installed inside a duct or tube that is allows for air to come into the room from the outside. It’s also important to have a vent/ fan that takes air out of the fruiting chamber, or put more simply it’s important to have an air exchange system as the growing mushrooms will produce CO2 and will need oxygen.
Hope this is helpful, let me know if you’ve got other questions.
one more picture:

One more picture from the farm . . .
Sally let me know where I can connect with you.
I’m in Toronto and produce my own spawn.
If shipping temperatures are reasonable (like now in the summer) I can offer you oyster (white, pink, blue and golden), shitake, enokitake, and lion’s mane grown on organic rye grain.
Regards,
I’ll reach out to Sally. I can provide her with spawn. I’ve got a lab set up now, where I’m producing about 20kg of spawn per week.
And w
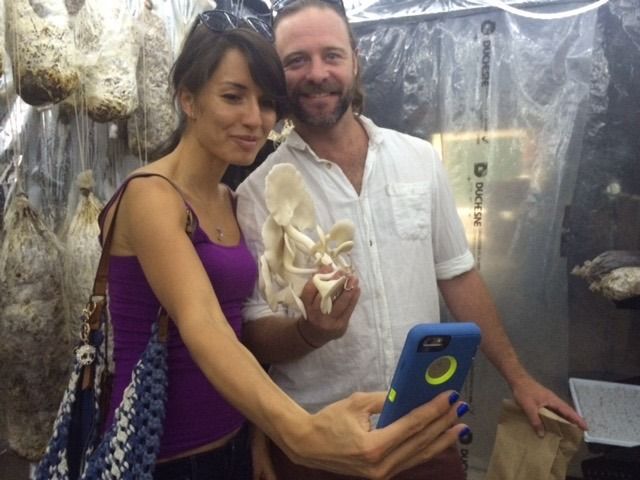
I’m currently selling directly to consumers with a pick-your-own offering, where they can come into the farm an literally pick their mushrooms as they’re still growing. Doesn’t get any fresher. Everything left over (which isn’t much) goes to the restaurant onsite, which specializes in local foods (doesn’t get any more local).
Here are a couple of customers who’ve just picked their own and were compelled to take a selfie when they did so. The gentleman is holding one purchase in the bag in his hand and they decided to purchase more for the photo.

You’ve already answered my question in a previous reply that I’ve cut-n-pasted here, sorry for the extraneous post, and thanks for the answer.
The best place to make the holes is directly where the white colonised substrate is. If you are using small bags, you may be best with just one cut appprox 5cm x 5cm on one side of the bag. If you are using larger bags you could cut more holes of the same size but space them apart by 10-15 cms around the bag. You can cut a X shaped hole with clean scissors or a sharp knife. Introducing contamination at this point is less likely as the coffee is already colonised by the mushroom mycelium, but it’s still good practice to keep everythiing as clean as possible.
Best wishes,
Adam
Adam,
Thanks for the compliments. It’s a fun space to work. While everything in the kiln area (about the size of 4 football pitches) is post-industrial, the area all around it is park land.
Here’s a pic of one of the first bags to start fruiting . . .

Alphonso,
It’s actually not a basement but a massive kiln that was originally used for baking bricks that were used in construction. The site was used for about 100 years as the primary source for bricks in Toronto. It’s been unused as a facility for about 20 years and I’ve been able to work in one of four kilns to grow mushrooms.
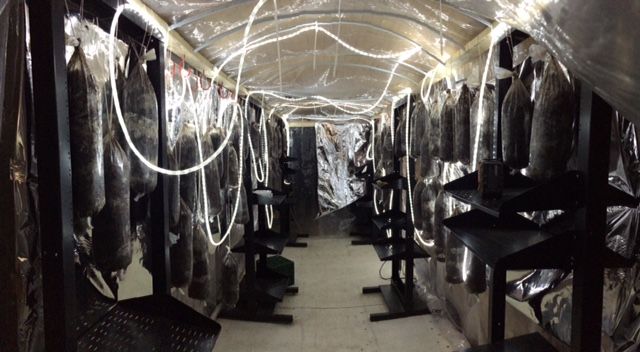
Here’s another view from earlier today:
And here’s a view from the outside:

Tara,
I mix hardwood pellets in with wet coffee, if I have to use wet coffee.
Hardwood pellets are typically used for fuel, but they’re great for adjusting the for wet substrate. They’re processed into pellets (extruded) in a high heat environment and are completely dry so they’re very good at resisting any other contaminants, if they’re kept dry.
As well, the hardwood is typically completely natural and contains no chemical additives. Finally, they’re relatively cheap, at about $5 for 20kg (in Canada).
Another picture of the new growing space as it continues to evolve . . .

Hi Alphonso,
The plastic sheeting is 6ml sheeting that’s available at most hardware stores here in Toronto, Canada. It comes in 3M widths and 30m lengths, so its easy to use.
The lights are on for 12 hours, usually 7am to 7pm. The lighting I’m using is 150 feet at 6000K (colour temperature).
The humidity is managed on a timer and a simple cigar box hygrometer (which I monitor by simply reading it and increasing or decreasing the time as needed). The timer is hooked up to a pond fogger that’s in a 20 litre pail or bucket of water.
Do an internet search for “pond fogger” if the idea is unclear. They’re about 12-20cm in diameter (or larger) and use a high frequency to atomize the water. They float in water and take away the need for daily manual misting.
The temperature is the ambient temperature of the area/ room but I use solar air heaters to supplement the room temperature.
I’ll be adding a sheet of reflective insulation to the area to increase the insulation capability and allow for better light distribution.
If I’m unclear or your have further questions please let me know.
Cheers,
Anthony


I’m setting up a new urban farm in Toronto.
How do I attach a picture to a post?